Sea to Summit Trail – Squamish
When I first rode the new Gondola located between Shannon Falls and Squamish in 2014 and picked up the trail map on descending, I was misled into thinking that those sweeping curves and the Pastoral Symphony countryside represented a new trail. Having now hiked this trail (September 2015) I can state that it is not. It is a connected series of well known and lesser known trails and logging roads, improved in places, and clearly marked from what is rather loftily called “base camp” at 35 metres to the summit lodge at 885 metres. It is 7.5 km one way with an elevation change of 850 metres. I’ve never hiked a trail that is more clearly marked. There are 400 consecutively numbered green markers from bottom to top. That means one post for every 22m or so. As well, every 500 metres there is a large sign indicating how many km you have covered of the 7.5 km total (e.g. You have now done 4 Km of 7.5 Km). You just can’t get lost and you always know just where you are with respect to distance (but not height; I will provide altimeter readings).
Access
To reach the start of this trail (coming from Vancouver), park in the (free) Overflow parking lot on the left hand side of Highway 99 by the traffic light at the entrance to Shannon Falls Park. Then walk across 99 (pedestrian signal) and along the short access road. Cross this road at the crosswalk where you should see a sign for the sea-to-summit trail. If not, just walk up the gravel road which leads to the Falls viewpoint as it swings around to the left. Note the sign pointing you along the road (small meadow on your left) and continue to the next signpost. Go down to the left to the next intersection and go right (do not go ahead across the small bridge unless you want to pick up a copy of the trail map at the “base camp”). You are now at green sign #1. This is the trailhead. The connecting trail from Overflow Parking to this point is about 600m long.
The Hike
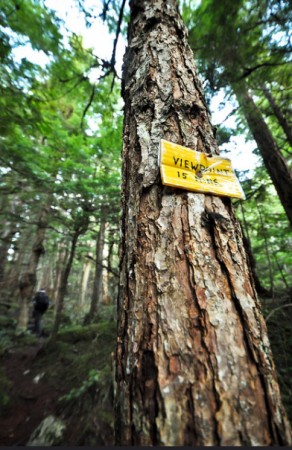
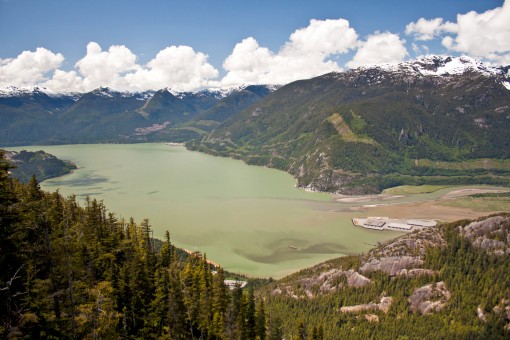
 Stage 1: Walk 10 minutes up the trail to where it joins the familiar Stawamus Chief trail (called Backside Chief Trail on the map) at Post 32, just before the lower Olesen Creek bridge. Cross the bridge. Now you must trudge up wooden stairs and boulder steps for 20 minutes to a trail junction at Post 68 where you go right on to the Upper Shannon Falls trail, with its crimson markers (in addition to the green posts – you just can’t get lost!). Almost at once you cross the upper Olesen Creek bridge at 270m. Turn right after the bridge on a short flat stretch, then the trail rises as its passes the Km 2 marker at 335m and immediately crosses under the gondola and continues to the bottom of a rock slide/gully at 370m where it swings up to the left. This takes about 30 minutes. You are at Km 2.5 as you begin a steep 15-minute climb up a gully, passing the Km 3 marker on your way to the top of this gully whereupon you lose some of the height you so laboriously gained until you come to the upper falls in about 25 minutes. (There’s a short side trail for a view). You now encounter the first of four fixed lines on this trail, a metal chain attached to the rock face on your left as you ascend some rather precarious little wooden steps (Note the remnant of the wooden banister on you right that was the previous helper here). At Km 3.5 you are at 400m with rushing water on you right. Years ago, I put up a yellow sign indicating that there is a viewpoint 15 minutes away. It has gone. So, you now turn away from the creek to approach the foot of another steep gully in 15 minutes. You will now use the second fixed line, a blue rope that helps you up, using your left hand, to reach a splendid viewpoint at 500m. (This replaces one of Halvor Lunden’s classic rubber-braided steel cables, on which you could pull yourself up, or let yourself down, the gully with two hands). At the viewpoint, the Squamish valley is spread out beneath you with breath-taking views of the town, the surrounding mountains, and the Chief. It takes about 2 hours, more or less, to reach here from post 1. Light rain began to fall on the day I did the hike. I sheltered in that little tree clump you can see with its convenient rock to sit on as I ate a sandwich and had a drink.
Stage 2: You can see the green marker on that hump so follow the trail up a bit, along to the left, then down into the forest as you pass the Km 4 marker. Years ago, this trail provided access to the Shannon Creek logging road system which, if you knew how to do it, gave you access to Petgill Lake. This is no longer possible. So follow the trail along to the left, on a reasonable gradient, passing the Km 4.5 mark at 555m. Soon, there is a small open space with 2 logs to sit on if you feel inclined to enjoy the view and a small creek to cross with a little bridge and then, quite suddenly, after about 25 minutes, you will find yourself out on a broad, smooth gravel road. This trail junction is at 605m and is the Km 5 point of the hike (two-thirds). On the map, this road is called Shannon Basin Loop. Walk along it to the left for 5 minutes to another trail junction, this one at 630m. This is where you must make a decision. If you go right on the Loop trail, now designated “Sea to Summit” (recommended if you are tired), the rating is intermediate; go left on Wrinkle Rock trail and you are on an advanced trail with two fixed lines. The loop trail is 50 per cent longer but easier. I did not follow it so cannot comment. By the way, on the original map this part of the loop was not shown and Wrinkle Rock was called Sea to Summit. No matter, if you go left the road soon ends and you pass the Km 5.5 mark on a steep trail. Continue uneventfully up past Km 6 at 650m. It’s on the next stretch that you encounter two massive convex rock faces with black fixed lines to help you up. One has a couple of knots to further assist as you heave yourself up and over. Gondoliers, as they travel up and down in the cable cars, can glimpse you as you ascend. Thereafter, things ease off as, at 740m, you go by Km 6.5; later you will see an encouraging arrow pointing to the “Gondola Loading Dock” and even get a glimpse of the Summit Lodge but it’s still some way off. I did not see the Km 7 mark, probably because I had my head down on account of the rain and it was concealed by the brim. The gradient is not too bad on the final winding stretch as at last you meet the family-oriented Panorama Trail. Turn right and there’s the summit plaza and the Lodge. The green markers have accompanied you all the way, though the last one was not numbered 400! This part of the hike, from the second trail junction, takes about 45 minutes for a rough total of 3 hours 15 minutes for the entire hike from green post 1 (not counting rest stops. (Suggested time is 3-5 hours. You must add 10-15 minutes for the access trail from the parking lot, so count on 3.5 hours. Of course, times will vary a lot with the individual and will be affected by the weather – hot, wet, and so on). Use my times as a guideline only, not as “times to beat” (or fail to achieve).
P.S. The summer season is from mid-May to mid-October. Always note the hours of operation and the time of the last car down. Useful contacts:
General info: 1.855.732.8675 or, if local: 604.892.2550
URL: seatoskygondola.com
e-mail: [email protected]
Notes: (1) My cell phone did not work when I reached the lodge. The map says “cell phone coverage may be intermittent. (2) Judging by the number of hikers hurtling past me with determined looks, few clothes, and no packs, this hike threatens to become another “Grouse Grind” – and with a similar gondola ride down. No one stopped at the Viewpoint. Have your stopwatches handy!
U.N. Randonneur has been hiking the trails of south-western B.C. for 42 years and up to now has done 1,860 hikes in these mountains since he began in September 1973. He also climbed Kilimanjaro in September 1992


Comments that gratuitously attack or demean individuals or organizations are not acceptable. We reserve the right to remove comments or any other content we deem unacceptable in our sole discretion, including removing user names and profile pictures. For our full website terms and conditions including our legal guidelines for user postings and comments on www.vancouvertrails.com, please see our Terms of Use and Privacy Policy.