Whistler Alpine Hiking
Some of the best places for hiking and incredible scenery are the alpine areas, high in the mountains along the Sea To Sky region of British Columbia. The high elevation, harsh winter climate, and geological makeup of the area give way to glaciers, bright turquoise lakes, incredible mountain top views, gorgeous meadows full of wildflowers, and rugged trail terrain, all well above the treeline.
One of the popular areas for tourists to hike is on top of Whistler Mountain. However, as a local, I’ve always wondered, is it worth it to pay for a pass to hike the alpine trails in Whistler / Blackcomb? I’ve always been a bit skeptical about having to buy a pass to hike as there are plenty of great hiking trail options that are free or require a few dollars for parking.
After spending one sunny, clear day in late June hiking up the only route (which was an access road) that wasn’t under 2-meters of snow on top of Whistler, I came to the conclusion that, yes, it is worth it. The views were nothing short of incredible! That was further reinforced this past weekend, now well into July and with only a few small patches of snow remaining, when we were able to hike several trails. Essentially, by paying to take the Gondola, you are able to skip the difficult, grueling upward climb and get to start your hike all fresh in the alpine, the best part! To compare it to another alpine trail, the first 6km+ hike up to Garibaldi Lake is the tiring section and it’s not until you get into the meadows or near to one of the lakes that you start to see the “good stuff”.
High Note and Cheakamus Views
We chose to hike the High Note Trail, which is labeled a as black diamond route on the Whistler Blackcomb maps but is more like a long Intermediate hike in comparison to some of the trails on Vancouver Trails. The estimated time given for this trail is about 3-4 hours, which is about right when you take into consideration all the time of stopping to enjoy the views.
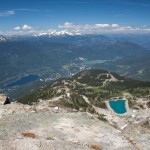
After taking the Gondola up from Whistler Village, there is a short trail to the right that takes you down to the Peak Express Chairlift. This chairlift takes you to the very top, where the High Note Trail begins. If you’re visiting on a clear, sunny day, the views from the peak are incredible as you can see right down to the Village from one side and across, into Garibaldi Provincial Park from the other side. The dark, protruding peak of Black Tusk sits among the peaks of Garibaldi and is one of the most notable sites to be seen. Follow the trail down on the south side as it dips slightly and then does a small look on an adjacent rock, offering a different perspective of views.
The High Note trail starts from the southern most point and descends immediately before curling its way around the backside of the mountain. Watch your footing along the loose dirt and jagged rock while you remember to look up at the views below. The trail passes its first junction with the Half Note Trail, which takes you back over a crest and towards the Gondola. However, keep to the right and continue along the High Note Trail as the rocky terrain changes to a more grassy mountain side trail.
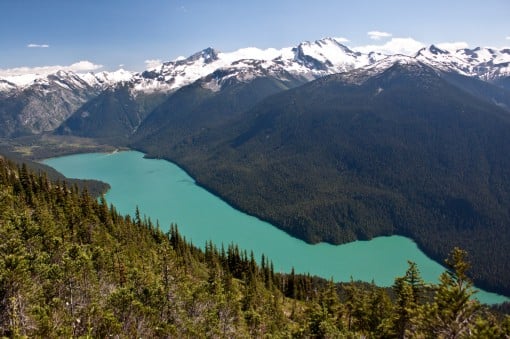
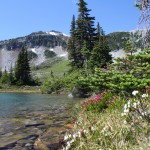
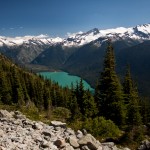
The section of trail after the Half Note junction offers the best views of Cheakamus Lake, the large turquoise coloured lake below. If you hike this trail in late-July or early-August, you may be in luck as this is the best time for the colourful array of wildflowers to be in bloom. The combination of flowers, lake, and snow capped mountain ranges make this one of the best viewpoints in Garibaldi Provincial Park.
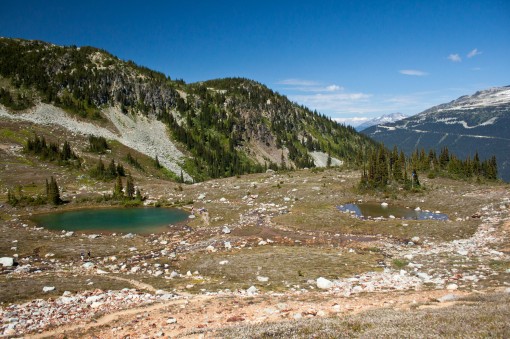
Continue hiking until you reach another junction. To the right, the trail continues along Singing Pass and eventually to Russet Lake, however you want to go left, continuing along the High Note Trail as it passes through a small meadow before descending into Symphony Bowl and arriving at Symphony Lake. After a short break, the trail continues uphill, passing through a rockslide area and up and over a pass, before descending again with many views of the mountains towards Blackcomb.
Eventually the trail meets up with the junction with the Harmony Lake Trail. Go right, continue downhill and then go left at the next junction and it’s only a short walk back to the Gondola where you began your hiker earlier.
Hiking with the Kids
It’s is possible to take your kids on the High Note Trail, however there are a few things to consider:
- The minimum height requirement to take children on the Peak Express Chairlift is 40” (about 1.2 meters). There are signs before the trail to the chairlift to check and the staff are very strict about these requirements. If you’re child is just under this height, save yourself a hike back up from the chairlift and hike a different trail.
- There are a couple of sections of the High Note Trail that are tricky, where you have to hold onto a rope, climb along a narrow section by a steep embankment. This definitely requires help from parents and is not an ideal situation for younger children.
- Once you’ve started the High Note trail, there are only a few options out: forward, back, or a fairly steep route out through the Half Note Trail. If you’re having doubts about the trail early on, turn back.
If you have any doubts, the other blue and green level trails are suitable for kids.
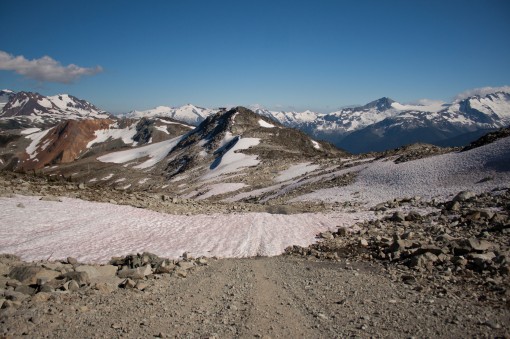
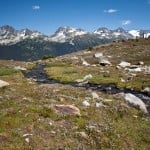
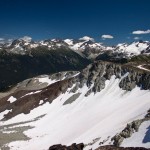
Snow lingers in Whistler’s Alpine into late-July. This photo was taken near where the Half Note Trail meets an access road.
Additional Planning
While you are hiking near a “resort” and taking a chairlift, don’t let the illusion of that cause you to not bring proper supplies or plan your trip appropriately. A few things to remember:
- Plan your hike to make sure you leave plenty of time to return to the Gondola and during daylight.
- Be cautious of Wildlife on the trail, which may include bears.
- Bring:
- Plenty of water – There are no places to get fresh water along the trail and drinking from the rivers and lakes is not recommended.
- Food and snacks.
- Sunscreen and protection from the sun. There is little, to no cover from the sun in the alpine area.
- Proper footwear for the rugged terrain.
- A map that is available at the top and bottom of the Gondola.
- A cell phone with a fully charged battery in case of an emergency. Note. Cell reception is fairly good on Whistler, however this is not the case on many mountains and hiking trails. Never rely on a cell phone, always tell someone where you are going and when you will be back.
- A friend or partner to hike with. It’s more fun and safer to have someone else there in case you run into trouble.
For more information on purchasing lift tickets or passes, visit the Whistler Blackcomb website. Note to BC Residents that there is a discount this year on summer passes, which makes it very worthwhile if you plan to hike in the alpine more than one day.
Have you hiked the High Note Trail at Whistler? Did you enjoy it? Have you hiked other alpine trails in Whistler Blackcomb?
One response to “Whistler Alpine Hiking”
Leave a Reply
Comments that gratuitously attack or demean individuals or organizations are not acceptable. We reserve the right to remove comments or any other content we deem unacceptable in our sole discretion, including removing user names and profile pictures. For our full website terms and conditions including our legal guidelines for user postings and comments on www.vancouvertrails.com, please see our Terms of Use and Privacy Policy.

I started the high note trail with the intent of finishing the loop but after pushing on to Oboe decided to go down singing pass. Went back a couple days later to see the views we missed on by not completing the loop. Both halves of the loop are beautiful but if you only have one day I’d recommend the upper half of the loop and singing pass trail. Skipping out on the last two peaks and just completing the loop is robbing yourself of some of the best views.
Oh and if you really don’t want to pay for the Gondola they were not checking passes at the top so if you walked up singing pass….
Walking up singing pass would be preferable to walking down anyway.